3 Stages of Project Management in the Medical Device Industry & How to Navigate Each
Stepping into the role of project manager at a medical device company is a unique and exciting experience. It’s also a challenge, but if you’ve decided to take on this role, you’re probably more than ready for it.
That said, I always recommend going in with a plan. I’ve been in your shoes, as a project manager for a medical device manufacturer, so I can tell you without reservation that the best way to get off to a great start is simply to plan ahead.
There are three stages every project manager will go through as they begin a new job at a medical device company. Today, I want to walk you through them and explain how you can take full advantage of each of them.
FREE DOWNLOAD: Click here to download your free PDF copy of our medical device project plan.
Stage One: Planning and building relationships
Think of this first stage as laying the groundwork for your future successes as a project manager. This is where you’ll prepare for your first project and start building crucial relationships with stakeholders.
There are three documents you’ll create during this stage, each of which will set you up for success later on.
The Project Charter
Every project has a sponsor; they’re the person who really wants this project to happen. To create the project charter, you’ll need to work in conjunction with the project’s sponsor. Together, you’ll answer the broad strokes:
-
What are you trying to accomplish with this project?
-
What’s the benefit to the business? Risks?
-
Who are the key stakeholders?
-
What are your objectives and constraints?
In other words, the project charter is where you establish the overarching goal of this project. It’s the north star that you’ll come back to when you’re deep in the weeds of getting your project done and can barely remember why you started in the first place.
Just kidding. Kinda.
The Communication Plan
The communication plan is where many project managers will struggle. It’s an essential document, but project managers often want to jump straight from establishing the vision to figuring out how to make it happen. That’s understandable, but without a good communication plan in place, your project is going to get bogged down quickly.
Your communication plan should set up the cadence for meetings with both your team and key stakeholders. It should also address who will be getting updates, when those updates will happen, and how they’ll be distributed. Will updates and important information be sent out via Slack or email? Bi-weekly or monthly?
These aren’t your only options, of course, but you should be thinking along these lines when you make the communication plan.
The Project Plan
Your project plan will depend in part on whether you’re working with an agile or waterfall methodology. Medical device companies are perfectly capable of using agile, but many, if not most, still use waterfall, so what I say here will be based on a project that is being run with waterfall.
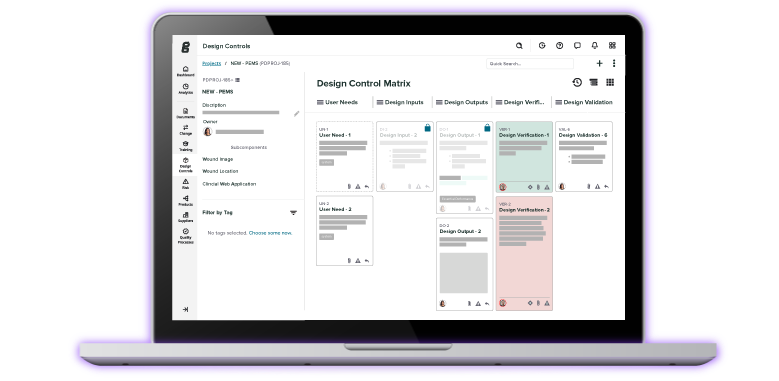
To build a project plan, you need to build out your milestones. At a medical device company, many of those will be your design controls. So, you may have milestones related to nailing down your user needs and your design inputs. Then you may have milestones for design outputs, verification, validation, and so on, all the way through product launch.
You’ll then take those milestones and break them down into manageable chunks using a work breakdown structure. For design outputs, this could mean completing and publishing the device drawings, building a bill of materials (BOM), vetting suppliers, and other tasks.
Creating all these documents, from the charter to the project plan, depends on you building strong relationships and working laterally with both the project team and management. As you get deeper into this project, having those good relationships will help you better understand the project’s requirements and identify and fix issues as quickly as possible.
Stage Two: Managing timelines and fighting scope creep
In the second stage of your new role, you’ll be spending more time truly managing the project. You’ll be scrutinizing your project plan, making sure your milestones and work breakdown structure are correct, and confirming your design history file (DHF) is being fleshed out as you perform design controls.
Basically, you’re making sure you have all your ducks in a row. Do you have a master validation plan in place? Are you on track to complete all your equipments IQ, OQ, PQs on time? Are your user needs and inputs nailed down, with high confidence they won’t need to change? This stage is really about lining everything up so you can meet your deadlines.
And speaking of deadlines, management will probably be asking about them. So, when you present your progress and your timelines, it’s a good idea to bring visuals you can use to easily show people where you are in the project and what you’ve accomplished. This could be an actual timeline or other graphics that clearly illustrate what you’ve done.
Fighting scope creep
This second stage is also where you’ll inevitably begin to experience some scope creep. You thought this device only needed A, B, and C, but now you’re being told it needs D and F.
The best way to head this off is by putting some sort of change control process in place. Change control is also part of your design controls for change orders, but in this case, I’m talking about something a little different.
This type of change control is for the project itself. Not every part of your project will be governed by design controls. FDA doesn’t care what your budget is. They don’t care what your timeline is. But you do, and you don’t want your budget and timeline to expand without any sort of control.
For example, let’s say your packaging validation is already underway and someone from marketing comes to you and says, “Hey, we now want to make our packaging an experience, like opening an Apple box.”
You have to be prepared to tell them, “If you want to do this, we have to get all the stakeholders to approve a six week addition to the timeline.” That’s a pretty informal version of change control for your project, but it’s essential that you’re prepared to do that when scope creep rears its ugly head.
Stage Three: Reestablishing your baseline and lessons learned
If you’ve found a way to control scope creep and stick to your project plan as well as possible, then at this stage, everything should be humming along nicely. You’ve built the relationships you need to understand and address issues quickly, and you’re probably starting to feel more confident in your new role.
All this means it’s a great time to establish a new baseline for your project and document and share what you’ve learned so far.
Establishing a new project baseline is about bringing everyone up to speed and resetting expectations. It doesn’t necessarily mean you’re running behind. Maybe the project is right on time. However, there are a ton of tasks that need to happen during the design and development of a medical device, and not everything will happen at the same speed.
Management will expect that some items will be lagging and others will be pacing ahead of schedule. But they’ll still be curious about where you are on your critical path.
That’s why this third stage is the perfect opportunity for a reset. There’s an idea from agile product development that I think is useful even if you’re using waterfall, and that’s the “retrospective,” or “lessons learned.” The retrospective portion of the agile methodology is something that happens at set periods throughout the project - not just at the end - and is where you show the stakeholders everything you’ve done and then offer your lessons learned.
Whenever you reset your baseline, it’s a good idea to use that concept of the retrospective to help everyone understand where you are and if there are any risks, issues, or outstanding decisions that need to be made.
Not only does it help update everyone, but it will get management on the same page as you reset your baseline. There will be some negotiation (there always is) about your new timeline, so it’s best to be working from the same information when you begin that negotiation.
Once the baseline is reset, you’ll essentially be repeating stages two and three until the project is finished. That said, it’s not a bad idea to revisit and update the foundational documents from stage one as needed.
FREE DOWNLOAD: Click here to download your free PDF copy of our medical device project plan.
Make your life easier with Greenlight Guru’s premarket quality management software
Whether you need to make sure your design controls are airtight, your documentation is flawless, or your risk management is integrated into your entire QMS, Greenlight Guru’s suite of premarket quality management software has you covered.
We understand that design controls, documentation, and risk management are the foundation of medical device design and development, and our software allows you to build the best foundation possible for bringing the safest and most effective medical devices to market as quickly as possible.
If you’re ready to experience Medtech Lifecycle Excellence, then get your free demo of Greenlight Guru today!
Looking for a design control solution to help you bring safer medical devices to market faster with less risk? Click here to take a quick tour of Greenlight Guru's Medical Device QMS software
Etienne Nichols is the Head of Industry Insights & Education at Greenlight Guru. As a Mechanical Engineer and Medical Device Guru, he specializes in simplifying complex ideas, teaching system integration, and connecting industry leaders. While hosting the Global Medical Device Podcast, Etienne has led over 200...
Related Posts
Case Study: How a Partnership with Greenlight Guru is Making This Dental Device Manufacturer Smile
Entering the Australia & New Zealand Markets: What Medical Device Manufacturers Need to Know
FDA Proposes New Rule to Regulate LDTs as IVDs: Here’s What’s at Stake
Get your free PDF
Medical Device Project Plan
